Sculpture Renders
Jul-Sep 2018
blender
rendering
photorealism
What I learned
- Material properties for photorealistic renders.
- Scene composition and lighting.
- High-poly mesh manipulation.

Im. 01, marble_render
The final render uses a CC0 marble texture mapped to the camera to give a high quality appearance without a comlex UV unwrap. The lighting system uses an HDRi to simulate natural sunlight.
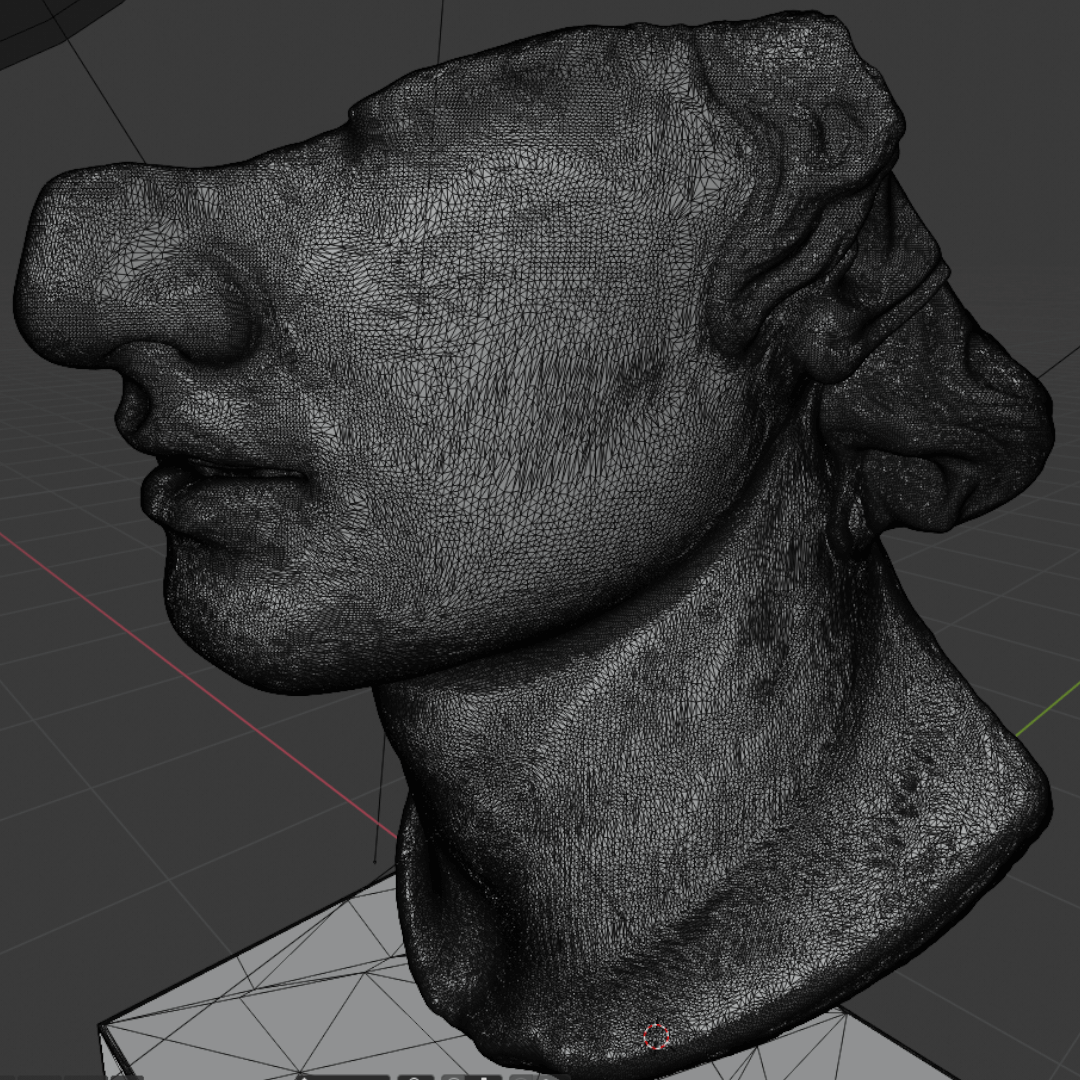
Im. 02, mesh_view
The high fidelity mesh is built of tris rather than quads, a non-ideal format for a shading and rendering software like Blender. The silver lining is that tri files, like STL’s and OBJ’s, are a quick export from CAD, so the process of applying materials is highly relevant for when I render personal models.
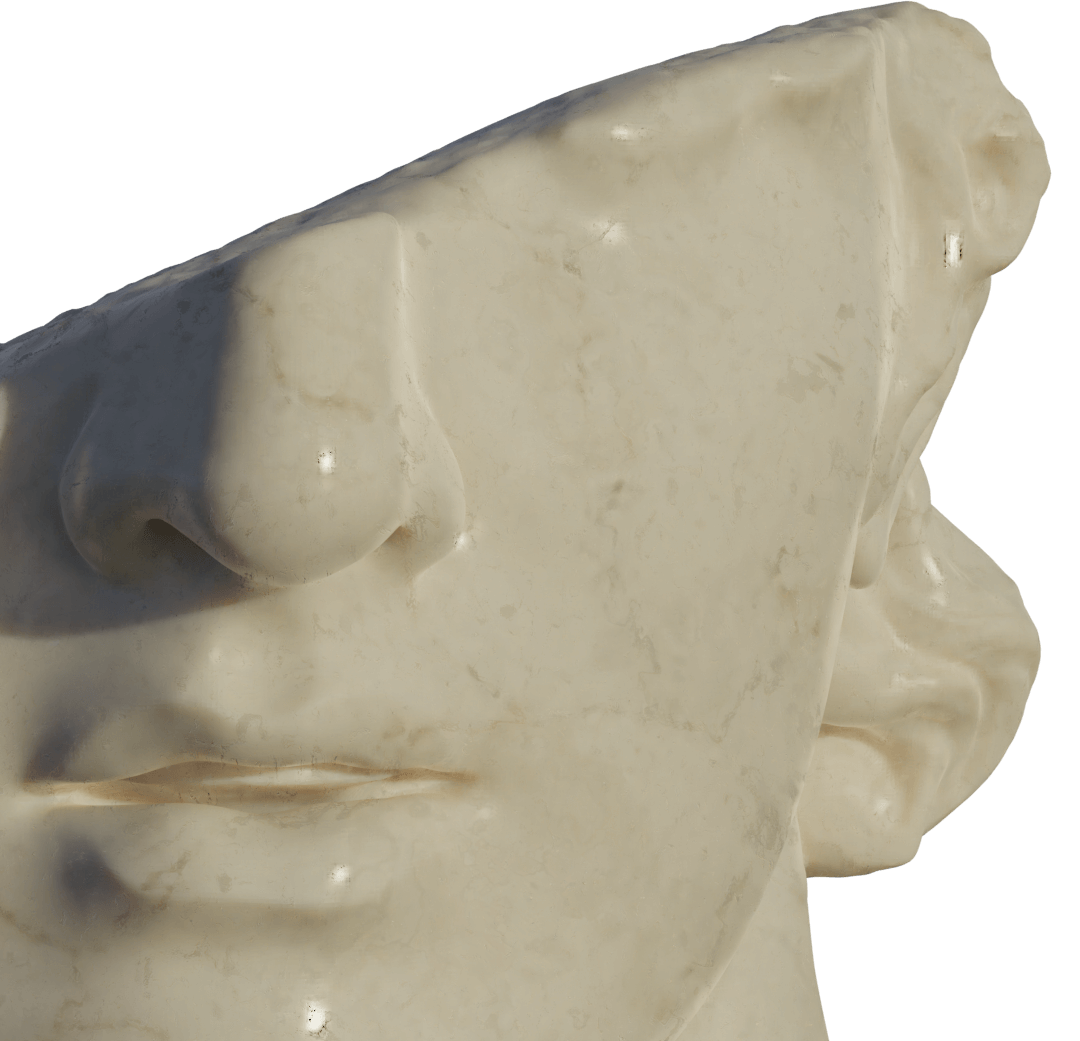
Im. 03, marble_detail
A benefit of using a dedicated rendering engine is the ability to fine tune the settings for extremely high quality. This cut section was from a +4000 x 4000px image, and the quality of the texture is incredible.
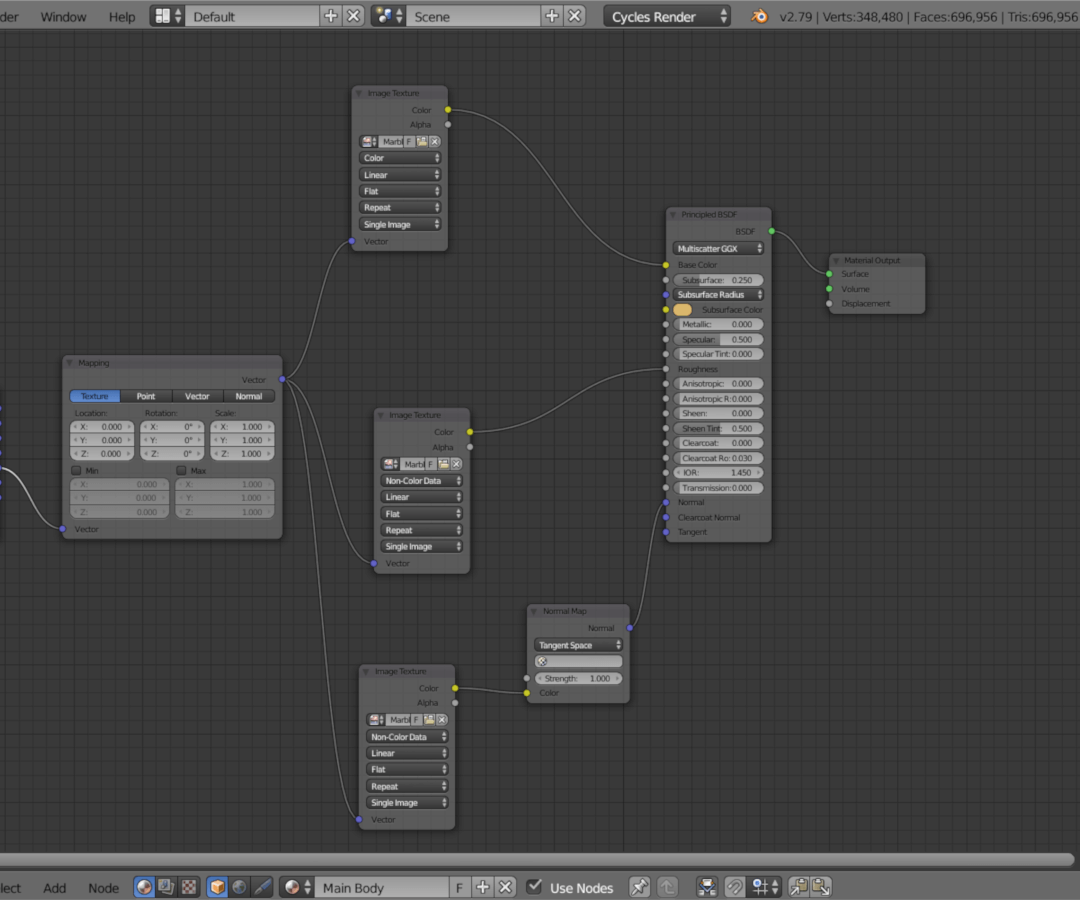
Im. 04, node_setup
Blender is a node based editor, so properties get calculated throughout a node tree and filter to the final output. The texture color, roughness, normals, mapping, and scaling were all fine tuned to result in the final render.
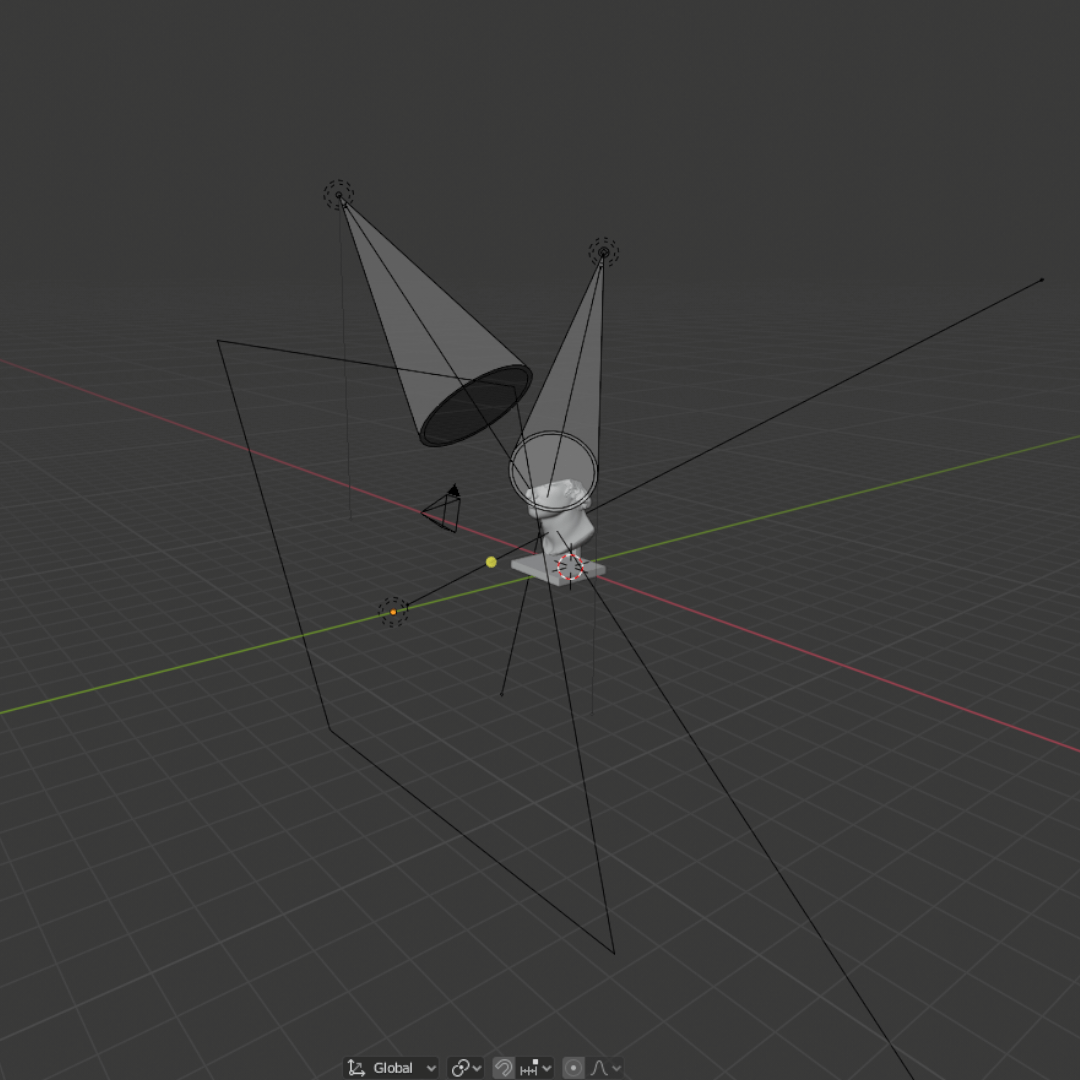
Im. 05, light_setup
I really liked the result from the HDRi, but for personal models I’ll want to emphasize certain aspects of the design visually. After much research, I was able to form a basic understanding of light and its expected behavior with different material types.
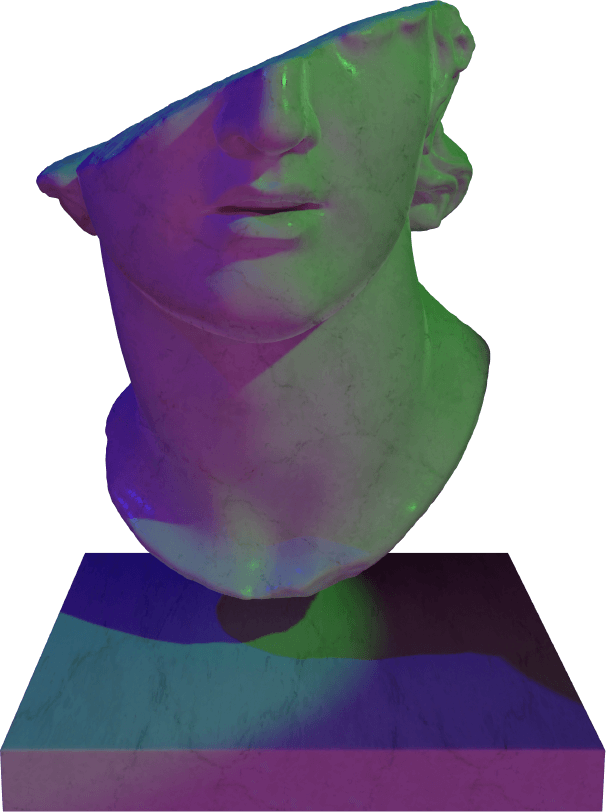
Im. 06, neon_noir
The result from the above lighting scheme is more artistic lighting that imitates a neon noir aesthetic.
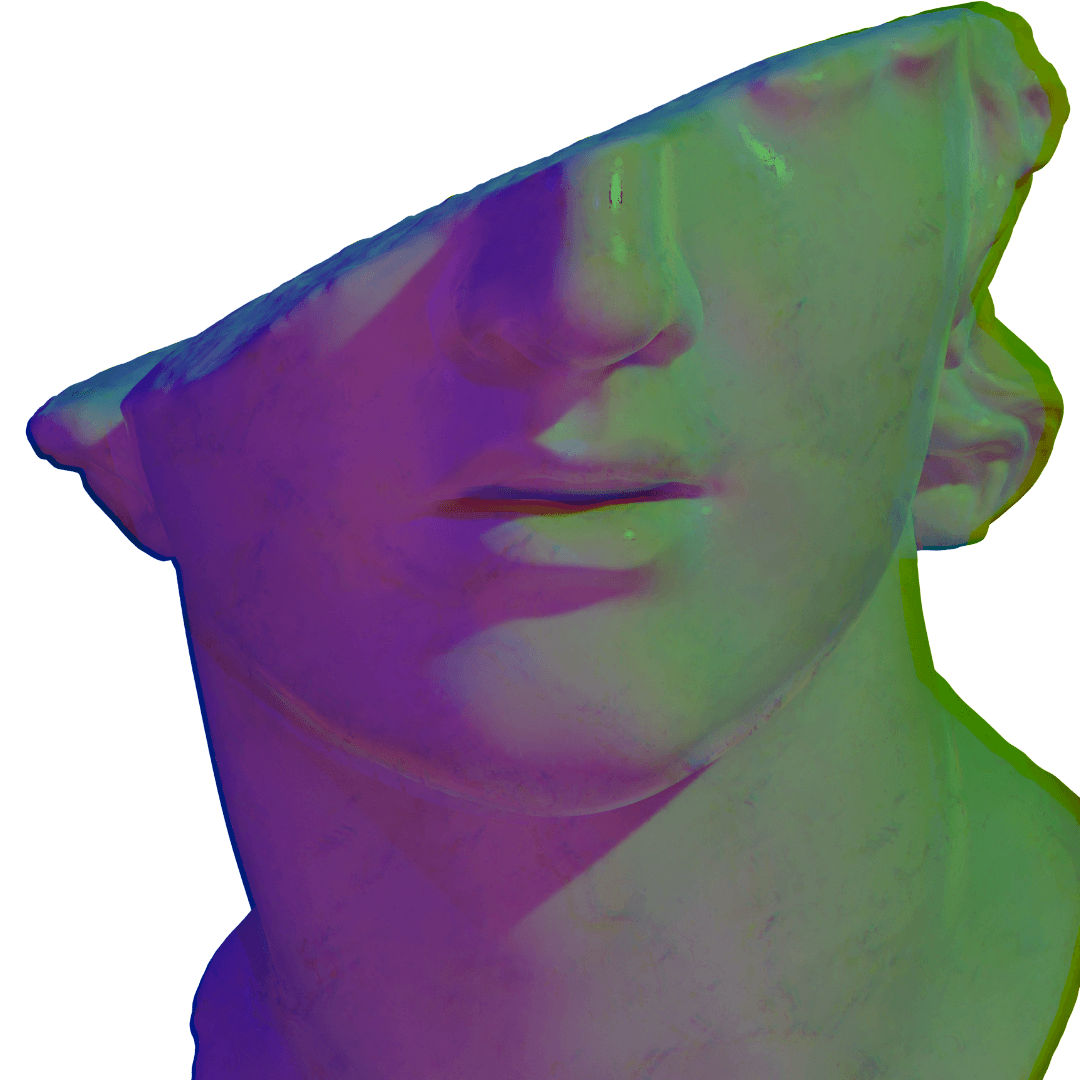
Im. 07, neon_detail
For a final render, I hopped into Blender’s compositor to add a little chromatic aberration for that subtle not-so-subtle aesthetic boost.