RetroPie Arcade
Jul-Aug 2020
fusion360
dfa
user experience
What I learned
- User centered design.
- Strong modeling techniques.
- Simulation and rendering.
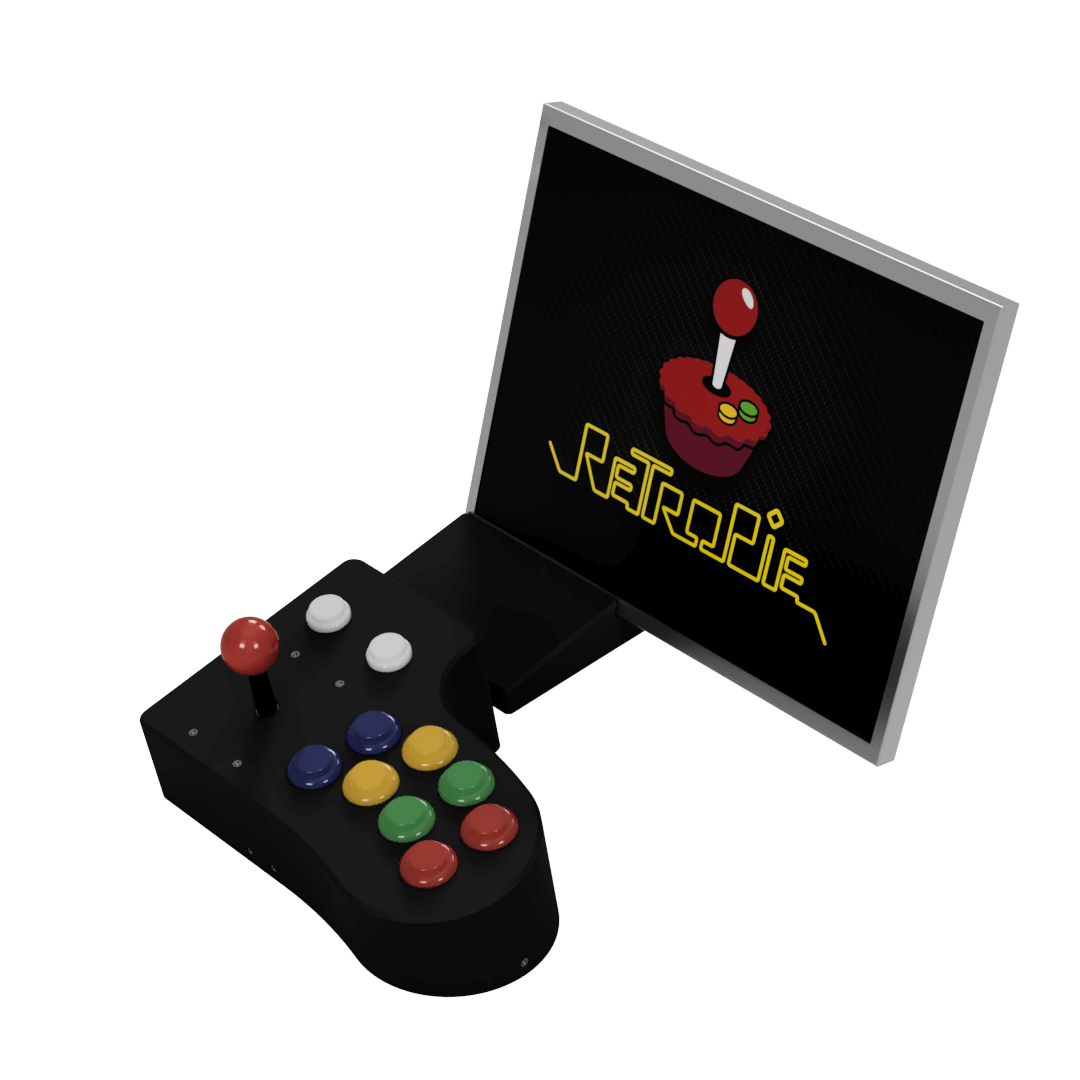
Im. 01, usage_render
A final render to represent a highly portable design. The screen was a simplified model based on an old computer monitor that I used for initial testing. The button layout references a traditional arcade cabinet, and each colored button is accurate to the final version.
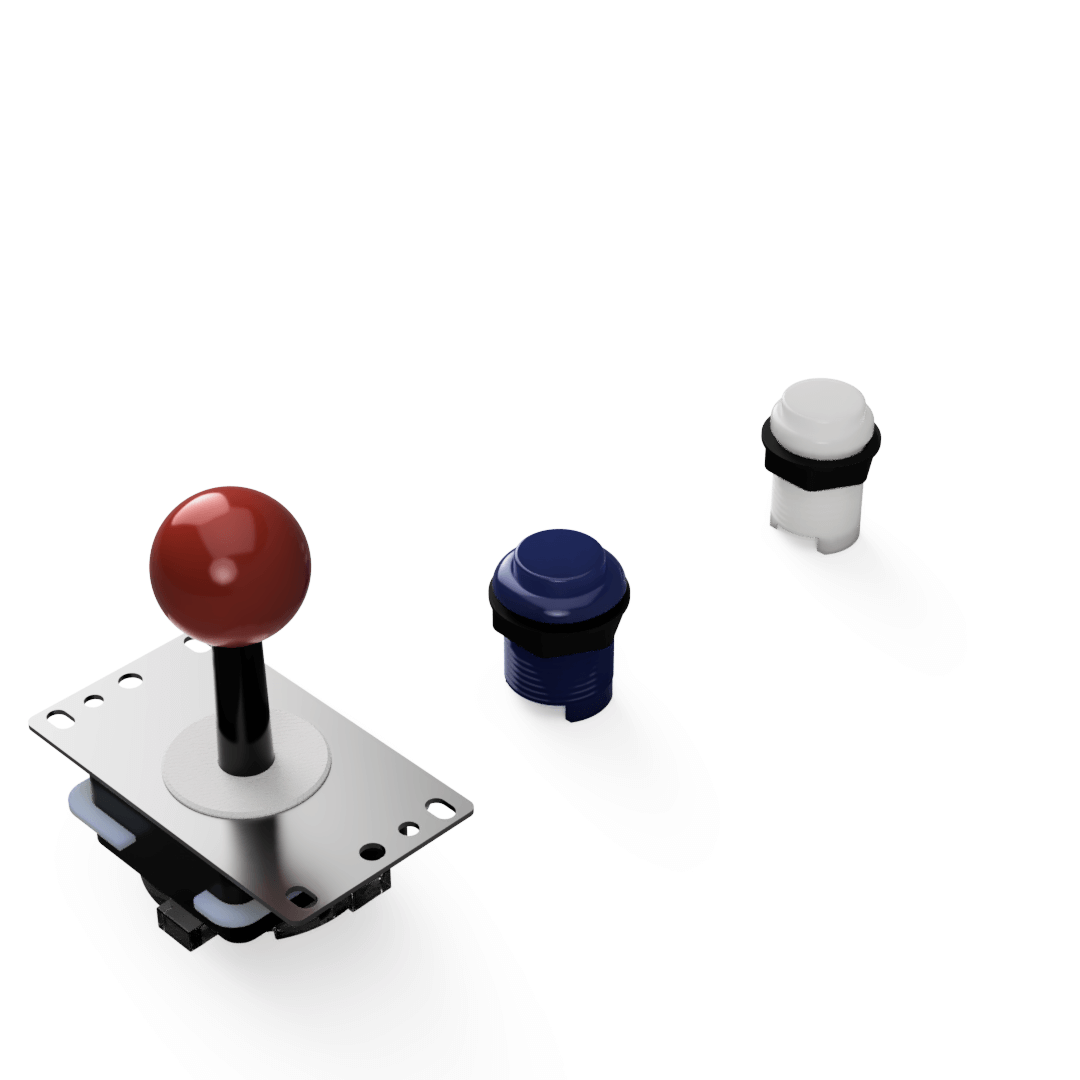
Im. 02, simplified_inputs
An important first step in the design was to create a simplified model of off the shelf components. The joystick bolding pattern was crucial for locating screw holes later in the design, and the button diameter helped to size the holes appropriately.
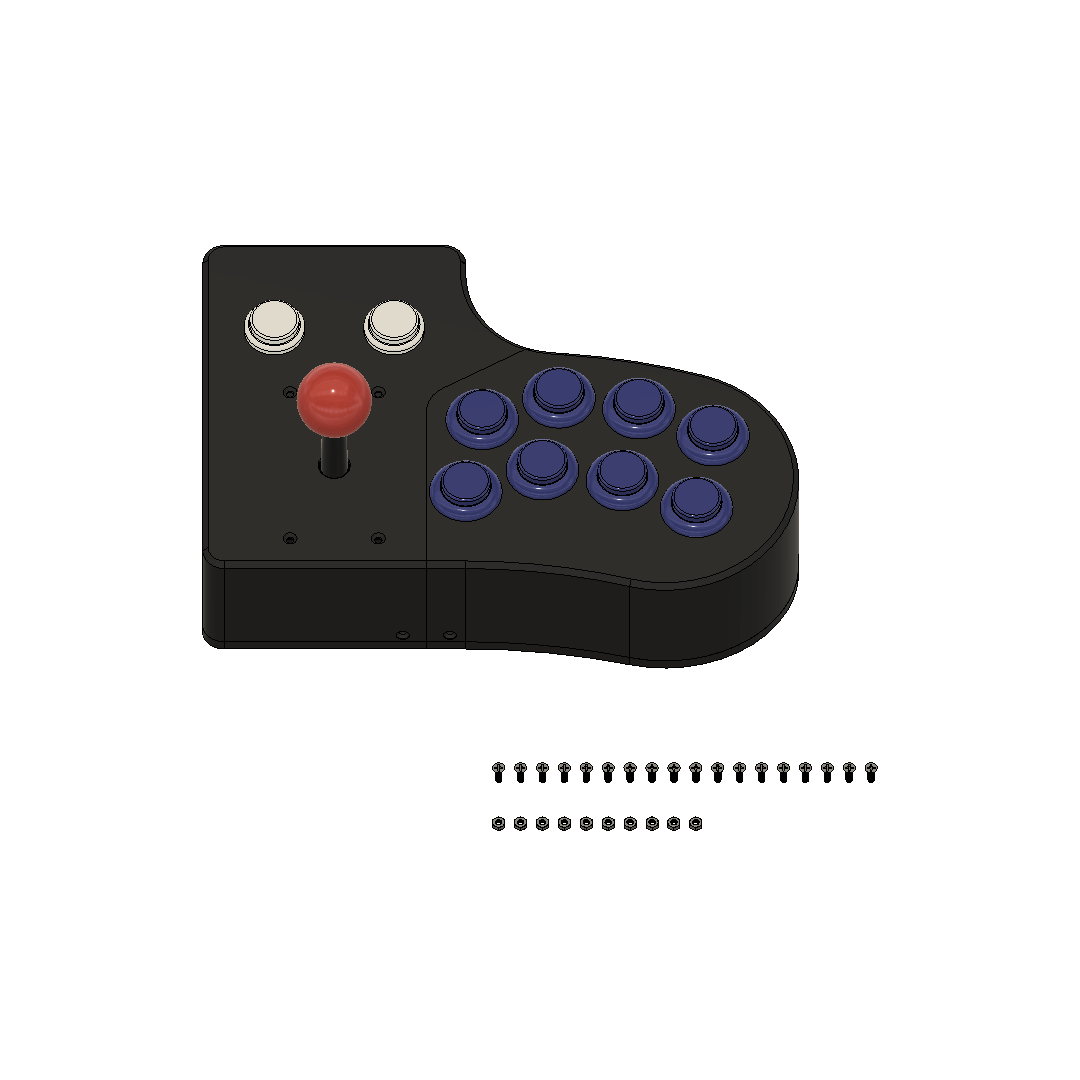
Im. 03, virtual_assembly
To see how everything would fit together in the real world, I assembled everything in CAD using McMaster Carr models for screws and nuts. The final design uses 18 M3-0.5x10 flat head screws and 6 M3-0.5 nuts.
Im. 04, assembly_animation
Since the file is meant to be shared, I created an assembly animation. This also helped me understand how things would work when I went to assemble it, and proved an invaluable asset in realizing the final product.
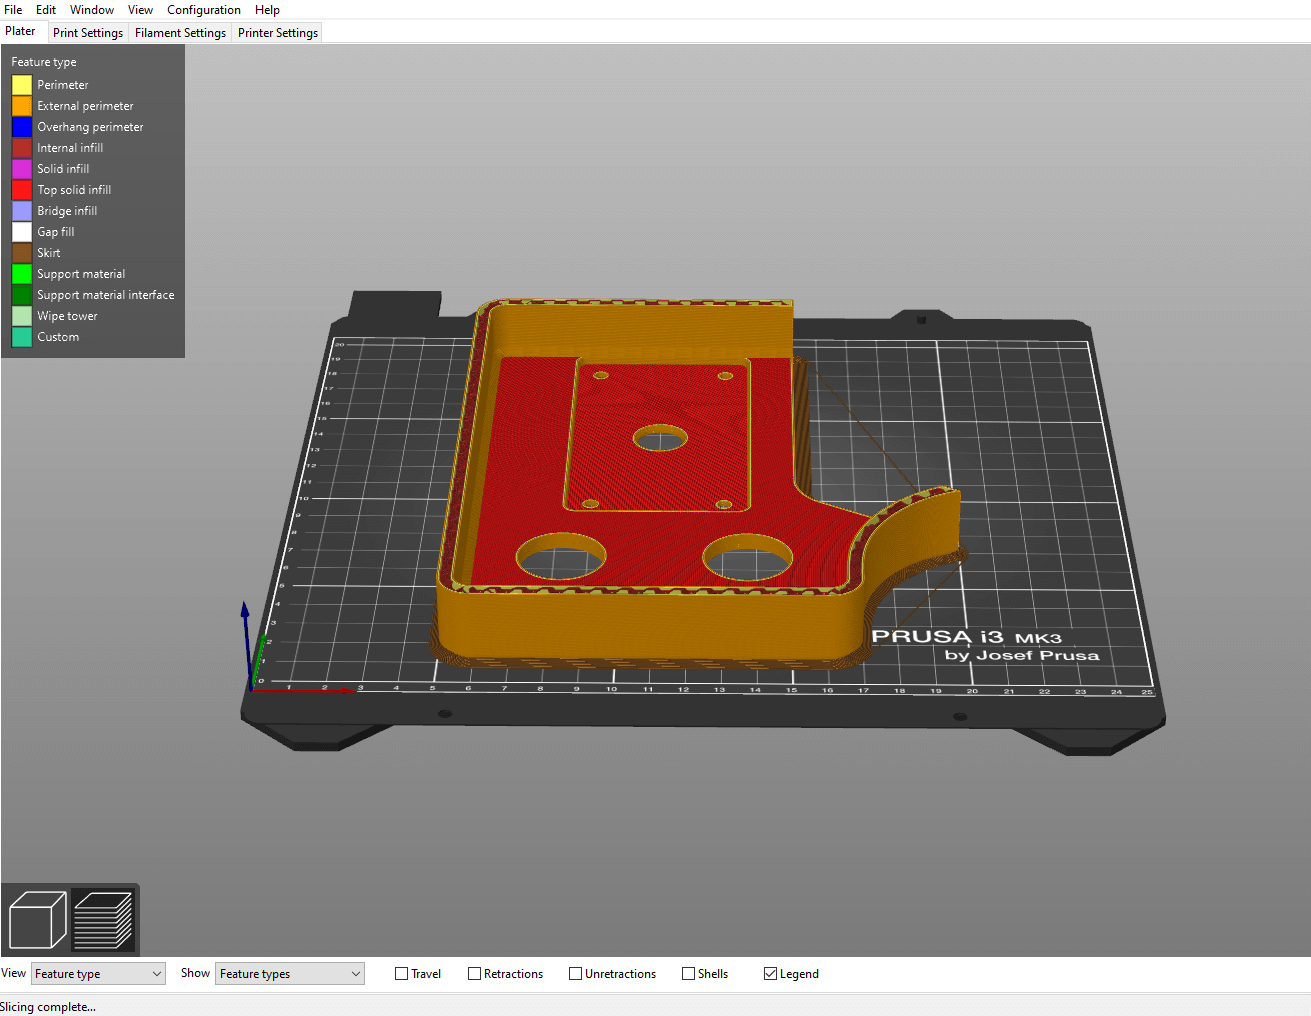
Im. 05, slicer_preview
With the intention to 3D print, a quick glance at the slicer preview shows how one body could be printed without supports. Some minor tweaks to the design are still needed, but all files will be uploaded once I finish. Please email me if you would like STL’s for the current iteration.
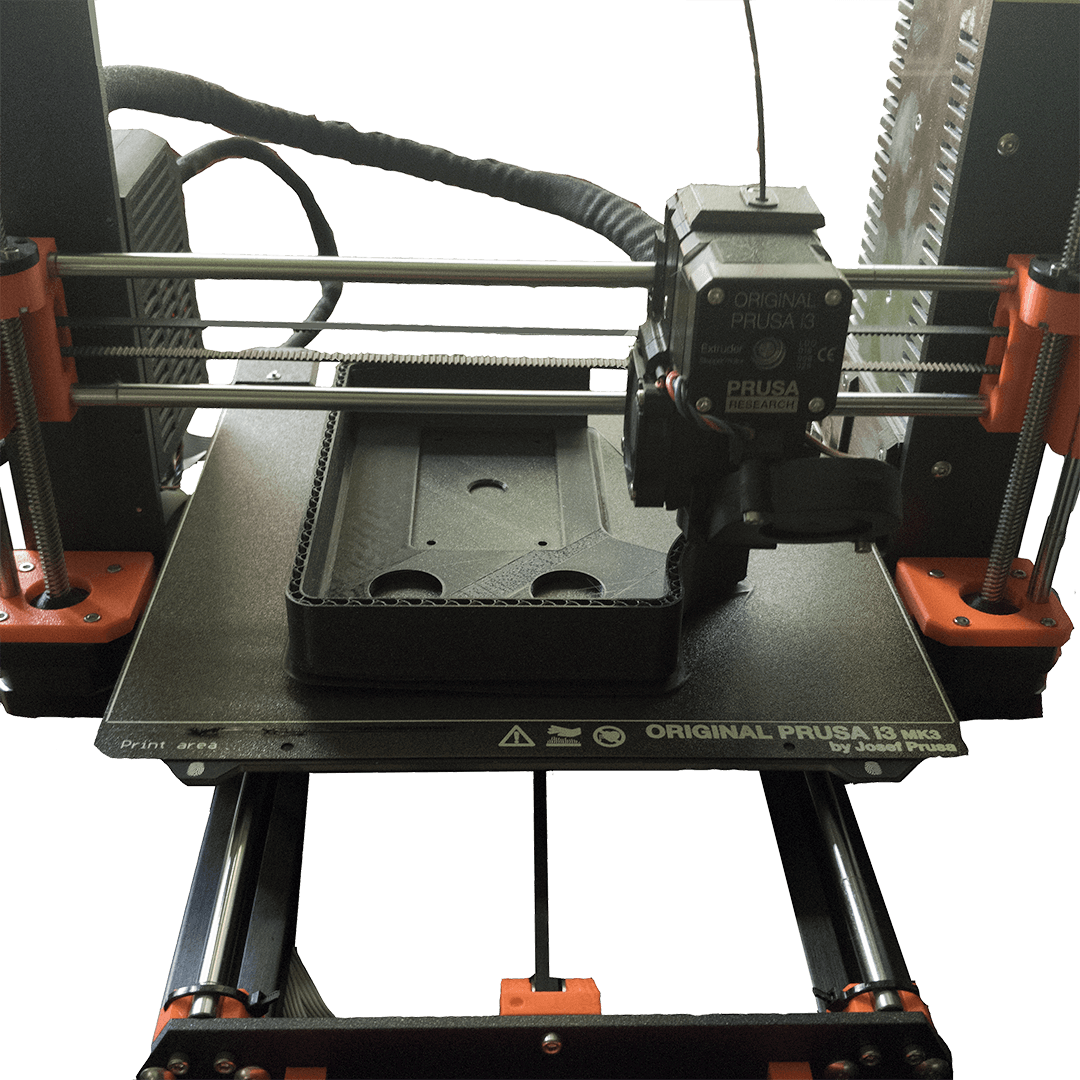
Im. 06, printing_preview
The above file being printed on my Prusa Mk3s. This print took roughly 17 hours, with the whole build totalling in around 48 hours.
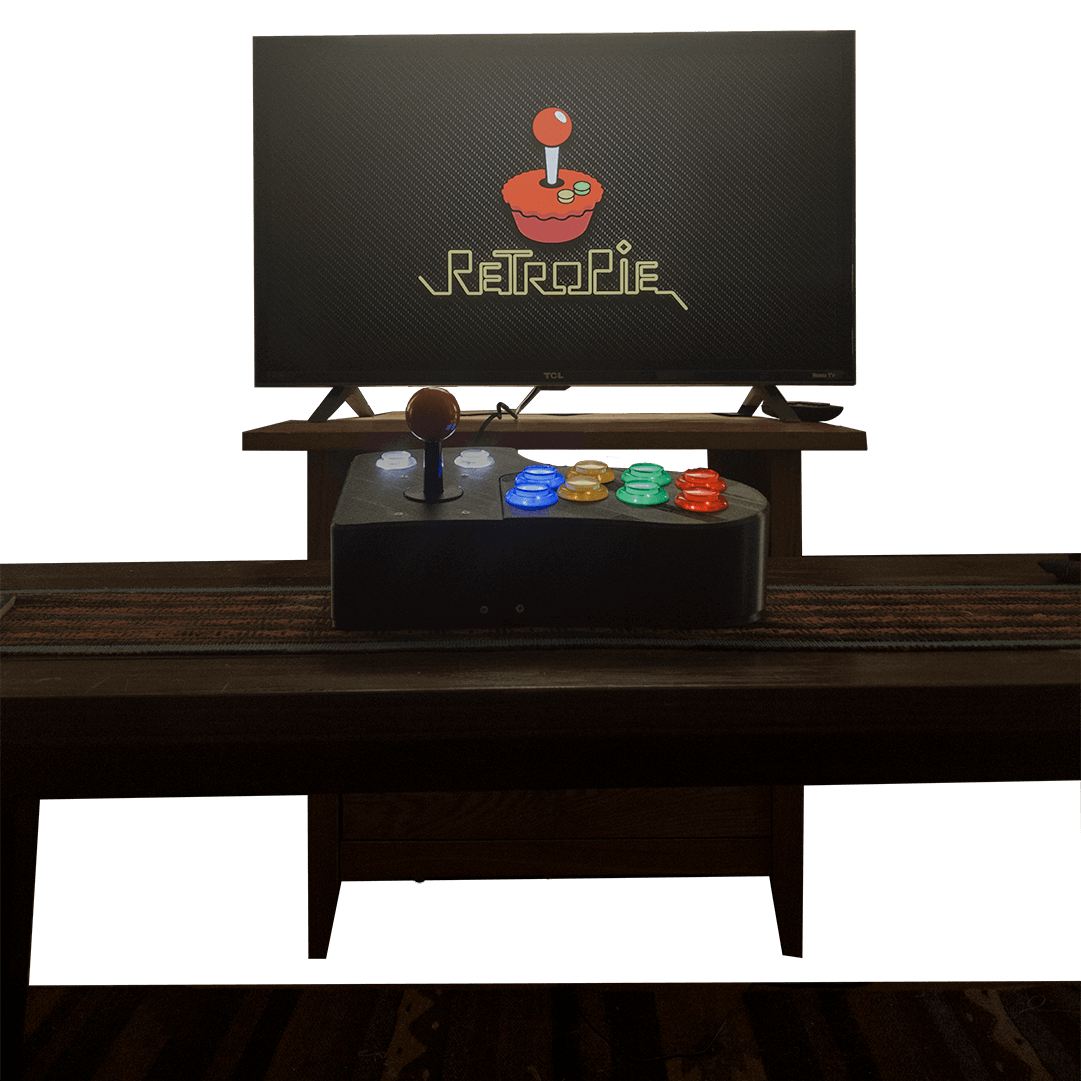
Im. 07, first_boot
Seeing the whole project come together was a really cool experience and tested my abilities with design for assembly, manufacturing, and user experience on a personal project. After many hours of work, plugging in and testing the final result was extremely rewarding.